Blog
Welcome To Our Blog!
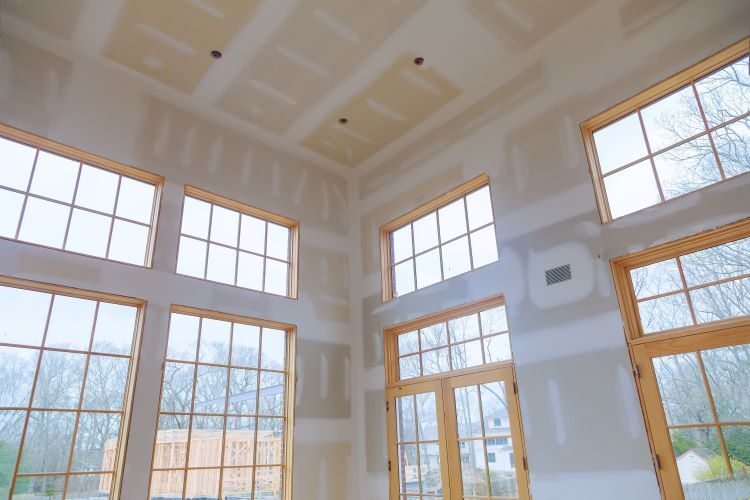
Drywall installation is a crucial step in any renovation or construction project. However, achieving a professional-looking result starts long before the drywall sheets are put in place. Proper wall preparation ensures a smooth and efficient installation process while enhancing the durability and appearance of your walls. At St. John's Drywallers , we emphasize the importance of preparation as the foundation of quality workmanship. Here’s how to get your walls ready for drywall installation in your St. John’s, Newfoundland home or business. Step 1: Clear the Space Start by removing any obstacles from the area. This includes furniture, décor, and other items that could get in the way of the installation process. Protect your floors and any immovable fixtures with drop cloths or plastic sheeting. Why It Matters: A clutter-free workspace allows for safer and faster installation while protecting your property from dust and debris. Step 2: Inspect the Walls Examine your existing walls or studs for any signs of damage, mold, or structural issues. If you’re working with an open wall frame, ensure the studs are intact and securely in place. What to Address: Cracks or Holes: Patch up imperfections to prevent issues later. Mold or Moisture: Resolve water damage and dry the area thoroughly to avoid long-term problems. Step 3: Check Insulation and Vapor Barriers For homes in St. John’s, where weather can be harsh and unpredictable, proper insulation is critical. If the wall requires insulation, install it before proceeding. In moisture-prone areas like basements, adding a vapor barrier is highly recommended. Pro Tip: Use moisture-resistant or fire-rated insulation materials where applicable to meet building codes and improve safety. Step 4: Confirm Proper Framing Ensure the wall studs are spaced correctly, typically 16 to 24 inches apart. Check that they are level and plumb, as uneven studs can lead to misaligned drywall. Tools Needed: Level: To ensure the studs are straight. Measuring Tape: To verify spacing accuracy. Step 5: Mark Electrical and Plumbing Fixtures If the wall includes electrical wiring, outlets, switches, or plumbing, these should be installed before the drywall goes up. Mark their locations clearly on the studs to avoid covering them during installation. Key Considerations: Ensure electrical boxes are installed flush with the planned drywall surface. Anchor plumbing securely to prevent shifting over time. Step 6: Clean and Smooth Surfaces Remove any debris, dust, or obstructions from the studs and surrounding area. If you’re covering an existing wall, ensure it is clean, dry, and free of loose paint or wallpaper. Optional Step: Apply primer or sealant to any exposed wood or existing wall materials to enhance adhesion and protect against moisture. Step 7: Gather Necessary Tools and Materials Preparation also involves ensuring you have everything you need for a seamless installation. Drywall Essentials Checklist: Drywall sheets (cut to size if needed) Screws or nails Drywall tape and joint compound Measuring tape, utility knife, and drywall saw Screw gun or drill Why Proper Preparation Is Key Taking the time to prepare your walls before drywall installation can save you from costly mistakes, time-consuming repairs, and long-term durability issues. At St. John's Drywallers , we pride ourselves on meticulous preparation that guarantees superior results for our clients in Newfoundland. Trust the Experts at St. John's Drywallers Proper wall preparation is just one part of the equation. With St. John’s Drywallers , you’ll get expert assistance at every step of the drywall process, from preparation to finishing. Why Choose Us? Local Expertise: We understand the unique building challenges in St. John’s. Experienced Team: Our professionals have years of experience in drywall installation. Quality Materials: We use only the best drywall and finishing products. Customer-Centric Service: We’re committed to ensuring your satisfaction with every project. Conclusion Preparing your walls for drywall installation is an essential step to achieving a flawless finish. By following these steps, you’ll create a solid foundation for your project and ensure that your drywall looks great and lasts for years. For professional drywall services in St. John’s, Newfoundland, contact St. John’s Drywallers today. Let us handle your project with precision and care!
When it comes to constructing or renovating interiors, the choice of drywall can significantly impact the aesthetics, durability, and functionality of your space. Solid gypsum sheets are becoming the top choice for homeowners and builders alike in St. John's, Newfoundland, thanks to their unparalleled benefits. At St. John's Drywallers , we believe in providing our clients with the best materials, and solid gypsum sheets are a superior option worth considering. What Are Solid Gypsum Sheets? Solid gypsum sheets are made from a core of gypsum—a naturally occurring mineral—encased in paper or fiberglass. This material is known for its strength, versatility, and excellent fire-resistant properties. Gypsum drywall is available in various types and thicknesses, making it suitable for a wide range of applications, from residential to commercial projects. Benefits of Solid Gypsum Sheets 1. Superior Strength and Durability Solid gypsum sheets are engineered for longevity. Their dense core provides excellent resistance to cracks, dents, and impact, making them ideal for high-traffic areas. Applications: Living rooms and hallways. Schools, hospitals, and office spaces. 2. Excellent Fire Resistance Gypsum is naturally fire-resistant, offering an added layer of safety to your home or business. Features: Fire-rated gypsum sheets slow the spread of flames, buying crucial time during emergencies. These sheets meet strict fire code requirements, making them a preferred choice for safety-conscious builders. 3. Moisture and Mold Resistance St. John’s climate can bring challenges like high humidity and condensation. Solid gypsum sheets designed for moisture resistance are perfect for combating these conditions. Benefits: Prevents mold and mildew growth, ensuring better air quality indoors. Ideal for kitchens, bathrooms, and basements. 4. Soundproofing Qualities Gypsum drywall effectively reduces noise transmission, providing a quieter, more peaceful environment. Ideal for: Home offices or study rooms. Shared walls in apartment buildings or duplexes. 5. Easy Installation and Maintenance Solid gypsum sheets are lightweight yet sturdy, making them easier to handle during installation. They are also simple to repair and finish. Features: Can be cut to size with standard tools. Compatible with a variety of paints and finishes, allowing customization. Choosing the Right Type of Gypsum Drywall Not all gypsum sheets are created equal. Depending on your specific needs, you can choose from: Regular Gypsum Boards: Standard drywall for general use. Moisture-Resistant Boards: Designed for damp areas. Fire-Resistant Boards: Ideal for safety-critical applications. Soundproof Boards: Specialized for noise reduction. Tip: Work with a professional drywall contractor to determine the best option for your space. Why St. John’s Drywallers Trust Solid Gypsum Sheets At St. John’s Drywallers, we prioritize quality and performance in every project. Solid gypsum sheets offer: Versatility: Suitable for walls, ceilings, and even curved surfaces. Reliability: Trusted by builders and contractors for consistent results. Cost-Effectiveness: A long-lasting investment for your property. Conclusion Whether you're remodeling a cozy home or working on a large-scale commercial project, solid gypsum sheets are an excellent choice for superior drywall solutions. Their strength, fire resistance, and versatility make them a standout material for creating beautiful and functional spaces. Ready to upgrade your walls? Contact St. John's Drywallers today for expert advice and professional installation services. Let us help you achieve flawless interiors with the best materials on the market!
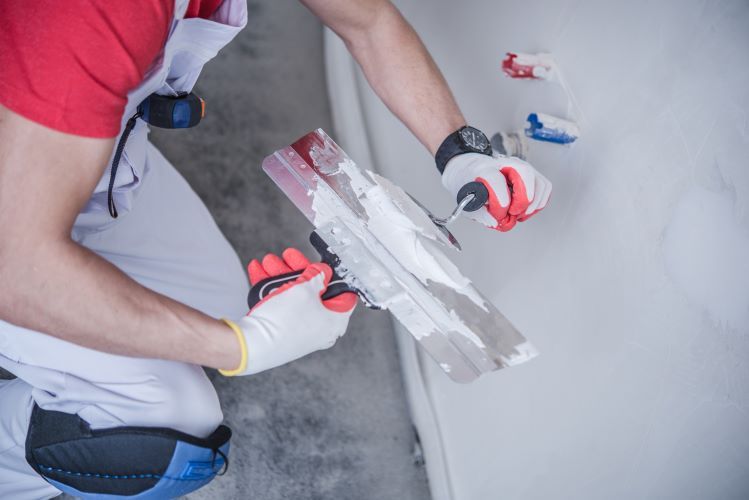
Drywall finishing is a crucial part of any renovation or construction project, providing a smooth, polished look to your interiors. Whether you're building a new home or remodeling an existing space, achieving a flawless drywall finish can significantly enhance the aesthetics and value of your property. At St. John's Drywallers , we specialize in delivering top-quality drywall services to homeowners and businesses in St. John's, Newfoundland. In this guide, we'll walk you through the entire process of drywall finishing , explaining each step in detail to help you achieve professional results. Why Drywall Finishing Matters Before diving into the process, let's explore why drywall finishing is so important: Aesthetic Appeal: Proper finishing results in smooth, even walls that are ready for painting or wallpapering, giving your space a polished, professional look. Durability: High-quality finishing strengthens the drywall, making it more resistant to wear and tear over time. Increased Property Value: Well-finished walls can enhance the value of your home, especially if you're planning to sell in the future. Understanding the 5 Levels of Drywall Finishing Drywall finishing is categorized into five levels, each representing a different degree of smoothness and preparation for painting or texturing: Level 0: No finishing is done; drywall is simply hung. Ideal for temporary spaces. Level 1: Joints are covered with a single coat of compound and tape. Suitable for areas hidden from view, like attics and utility rooms. Level 2: A second coat of compound is applied over the tape. Commonly used in garages and storage areas. Level 3: Three coats of compound are applied, perfect for walls that will receive a heavy texture or low-sheen paint. Level 4: Three coats of compound are applied, sanded, and ready for flat or satin paint finishes. This is the standard for most residential interiors. Level 5: The highest level, with a skim coat applied over the entire surface. Ideal for areas with high-gloss paint or critical lighting. For most home projects, Level 4 is the standard, while Level 5 is recommended for areas where a flawless finish is required. Step-by-Step Guide to the Drywall Finishing Process Step 1: Preparation Before you begin, it's essential to prepare the drywall surface. This includes checking for any protruding screws, loose drywall sheets, or damaged edges. Make sure the surface is clean and free of dust. Tools Needed: Utility knife, screwdriver, sanding block. Tip: Use a shop vac to clean up dust and debris from the drywall for better compound adhesion. Step 2: Taping the Joints The first step in finishing drywall is applying tape to the joints between the drywall sheets. This reinforces the seams and prevents cracks from forming. Paper Tape vs. Mesh Tape: Paper Tape: Stronger and more resistant to cracks. Ideal for long-term durability. Mesh Tape: Easier to work with but may require more compound for a smooth finish. Using a 6-inch drywall knife, apply a thin layer of joint compound along the seams. Then, embed the tape into the wet compound, pressing it firmly to ensure a strong bond. Step 3: Applying the First Coat of Joint Compound (Mudding) With the tape in place, it's time to apply the first coat of joint compound, also known as "mud." This coat covers the taped seams and screw holes. Application: Use a 10- to 12-inch drywall knife to spread the compound evenly over the seams. Feather the edges to create a smooth transition between the drywall and the compound. Drying Time: Allow 24 hours for the compound to dry completely before proceeding to the next coat. Step 4: Second Coat of Joint Compound After the first coat has dried, lightly sand the surface with a fine-grit sandpaper to remove any bumps or ridges. Wipe away any dust before applying the second coat. Goal: Extend the second coat a few inches beyond the first coat to further blend the seam into the drywall. Tip: Apply the compound in thin layers to avoid cracking and reduce drying time. Step 5: Third Coat of Joint Compound The third and final coat is used to perfect the surface, filling in any remaining imperfections. This coat should be thinner than the previous ones, focusing on creating a smooth, seamless finish. Application: Use a 12-inch drywall knife to feather the edges as much as possible, ensuring there are no visible lines. Drying Time: Let it dry for at least 24 hours before the final sanding. Step 6: Sanding for a Smooth Finish Once the final coat is dry, it's time to sand the entire surface to achieve a perfectly smooth finish. Use a sanding pole with fine-grit sandpaper for best results. Tip: Use a bright light held at an angle to the wall to highlight any remaining imperfections. Safety: Wear a dust mask and safety goggles to protect yourself from drywall dust. Step 7: Priming the Walls The last step in the drywall finishing process is applying a coat of primer. This seals the drywall and provides a uniform surface for painting. Tools Needed: Roller, paintbrush, drywall primer. Tip: Use a high-quality primer to prevent flashing (uneven sheen) when painting. Common Mistakes to Avoid in Drywall Finishing Skipping the Sanding: Sanding between coats is crucial for a smooth finish. Applying Too Much Compound: This can lead to cracking and longer drying times. Not Using Primer: Skipping the primer can result in uneven paint coverage and poor adhesion. Why Choose St. John's Drywallers for Your Drywall Finishing Needs? At St. John's Drywallers, we take pride in delivering exceptional drywall finishing services tailored to your specific needs. Here's why homeowners and businesses in St. John's, Newfoundland, trust us: Experienced Professionals: Our skilled team has years of experience in drywall finishing, ensuring flawless results. Quality Materials: We use only the best compounds, tapes, and primers for long-lasting durability. Customer Satisfaction: We are committed to providing high-quality services that exceed your expectations. Final Thoughts Drywall finishing is an art that requires patience, skill, and attention to detail. By following the right process and using the correct tools, you can achieve a smooth, professional finish that enhances the beauty of your interiors. Whether you're tackling a DIY project or need expert assistance, St. John's Drywallers is here to help with all your drywall needs. Ready to transform your space? Contact St. John's Drywallers today for a free consultation and estimate on your next drywall finishing project!

Drywall repair is a common household task, whether you're fixing a small crack or addressing more significant damage. If you want your repairs to blend seamlessly with the rest of the wall, it's essential to have the right tools and materials on hand. At St. John's Drywallers , we specialize in drywall repairs , and we’ve helped countless homeowners in St. John’s restore their walls and ceilings to like-new condition. To help you get started, here’s a complete checklist of must-have supplies for flawless drywall repair. Whether you're a DIY enthusiast or just looking to patch up some minor damage, this list will ensure you have everything you need for a smooth and professional-looking repair. 1. Drywall Patch or Replacement Piece For minor holes or damage, a drywall patch is often sufficient. However, for larger holes or sections where drywall has been compromised, you’ll need to replace the damaged area with a new piece of drywall. Pre-made drywall patches: Ideal for quick fixes of smaller holes (4-6 inches in diameter). Full drywall sheets: For larger areas, you’ll need to measure and cut a new piece of drywall to fit the damaged section. 2. Joint Compound (Mud) Joint compound, or “drywall mud,” is essential for filling gaps, covering seams, and smoothing out imperfections in your repair area. It’s the key ingredient for creating a smooth, seamless finish. Ready-mixed joint compound: This is the most common choice for most drywall repairs. It’s easy to apply and dries to a smooth finish. Setting-type joint compound: This type dries faster and is useful for areas that need quick turnaround or higher humidity levels. 3. Drywall Tape To reinforce the joints and ensure a crack-free repair, drywall tape is used over the seams where two pieces of drywall meet. It helps hold the joint compound in place and provides additional support to prevent cracking. Paper tape: Provides a strong bond and is commonly used for most drywall repairs. Fiberglass mesh tape: Self-adhesive and easy to apply, this tape is best for quick fixes and small jobs. 4. Putty Knives Putty knives are essential for applying joint compound and smoothing out the mud over seams and patches. These tools come in a variety of sizes, and having a few on hand will allow you to finish the job with precision. 3-4 inch putty knife: Perfect for applying compound to small holes and cracks. 6-inch putty knife: Useful for spreading joint compound across wider seams or larger areas. 12-inch taping knife: A larger knife designed for finishing larger surfaces to create a smooth, even surface. 5. Sanding Tools Once the joint compound has dried, sanding is required to achieve a smooth and level finish that blends with the surrounding wall. Proper sanding ensures the repair is undetectable. Sanding sponge: Flexible and easy to maneuver, sanding sponges are great for corners and curved areas. Fine-grit sandpaper (220-grit): This is perfect for smoothing out drywall mud once it’s dry. Pole sander: A pole sander helps reach high or hard-to-reach areas, such as ceilings or high walls. 6. Drywall Screws or Nails If you need to replace a section of drywall, you’ll need drywall screws or nails to secure the new piece to the studs. Drywall screws are the most commonly used fasteners in drywall work. Drywall screws: These are designed to hold drywall tightly to the studs and prevent the material from shifting. Drywall nails: Though less common, nails can also be used for fixing drywall, especially in smaller, less critical areas. 7. Utility Knife A utility knife is essential for cutting drywall, whether you're trimming a patch to fit or cutting drywall sheets to size. A sharp utility knife ensures clean, precise cuts. Heavy-duty utility knife: Look for a knife with replaceable blades for ease of cutting and safety. 8. Measuring Tools Accurate measurements are key when replacing drywall or cutting patches. Without the right measurements, your repairs may not fit properly. Measuring tape: Helps you measure the dimensions of the area you need to repair. Drywall square: Ideal for ensuring straight, clean cuts when trimming drywall to size. 9. Primer and Paint Once your repair is finished, priming and painting the area will restore the wall to its original appearance. Primer seals the drywall, while paint ensures the repair blends seamlessly with the rest of the wall. Primer: Use a primer specifically designed for drywall to seal the surface and prepare it for painting. Wall paint: Choose the same type and color of paint as the surrounding wall for a perfect match. 10. Drop Cloth or Plastic Sheeting Drywall repairs can get messy, especially when you’re sanding. Protect your floors and furniture from dust and debris with a drop cloth or plastic sheeting. Drop cloth: Covers large floor areas to catch dust and debris. Plastic sheeting: Used to protect furniture, light fixtures, and other items from drywall dust. 11. Gloves and Safety Glasses Safety should always come first when doing drywall work. Wearing gloves and safety glasses will protect your hands and eyes from drywall dust, sharp edges, and flying debris. Work gloves: Protect your hands from abrasions and cuts while working with drywall. Safety glasses: Keep drywall dust and debris out of your eyes, especially when sanding. 12. Clean Cloth or Sponge After sanding the joint compound, use a clean cloth or sponge to wipe down the area before applying primer or paint. This ensures that no dust or debris will interfere with the finish. Conclusion With these essential tools and materials, you’ll be able to tackle any drywall repair project and achieve professional results. Whether you’re fixing a small hole, patching up cracks, or replacing larger sections of drywall, having the right supplies is crucial for a seamless finish. At St. John's Drywallers , we specialize in drywall repair for homes and businesses in St. John’s, Newfoundland. If you’re facing a more extensive drywall issue or simply want expert assistance, our team is ready to help. We’re committed to delivering high-quality repairs that blend seamlessly with your existing walls, ensuring your space looks as good as new. Need help with drywall repairs? Contact St. John's Drywallers today!
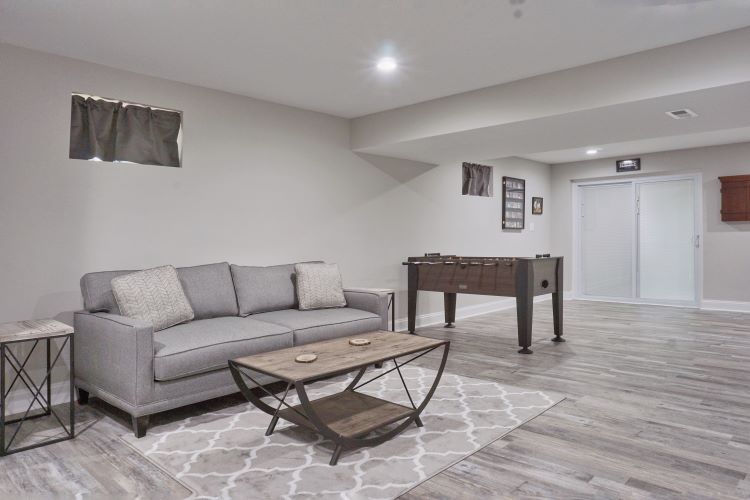
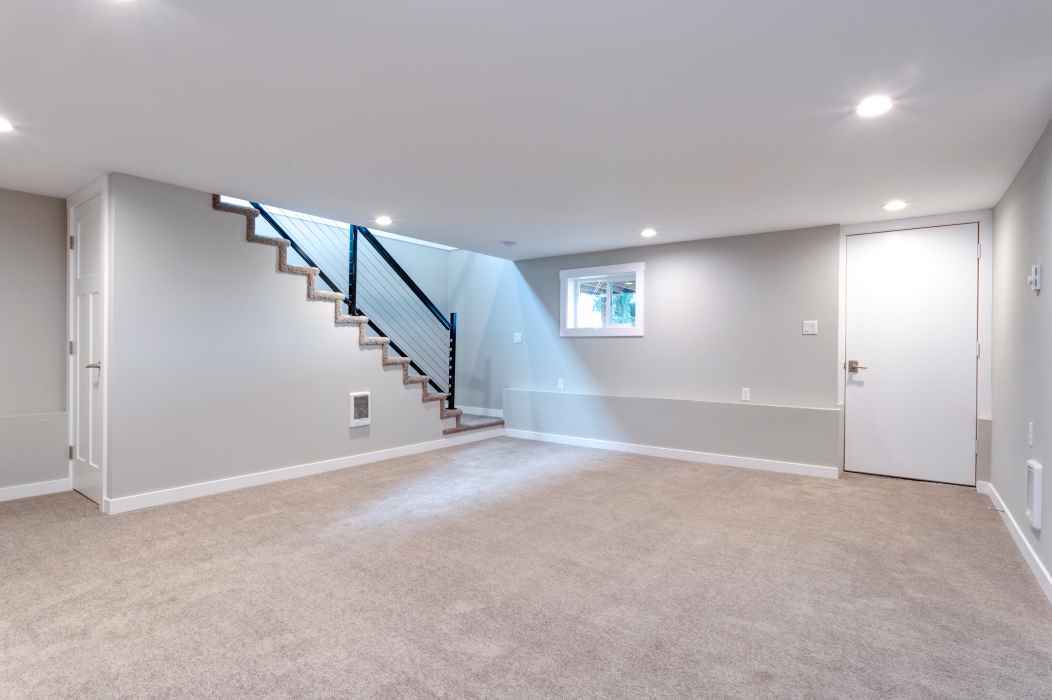
When it comes to finishing a basement, drywall installation is one of the most critical steps. This phase transforms an open, concrete area into a livable, polished space, ready for whatever you envision—a cozy family room, home office, or guest bedroom. At St. John's Drywallers , we know that understanding the timeline for basement drywall finishing is essential for planning, especially for homeowners eager to see their space take shape. Here’s what to expect for your basement drywall project, from preparation to final touches. Key Factors Affecting Basement Drywall Timeline The time required to drywall a basement depends on several factors, including the size of the space, wall condition, additional insulation needs, and the number of workers on-site. Here are some elements to consider when estimating how long your basement drywall project will take: Basement Size: The larger the basement, the longer it will take to hang, mud, and finish the drywall. On average, a standard 800-square-foot basement typically takes longer than a smaller area. Framing and Preparation: Before drywall installation, the walls need proper framing, insulation, and possibly moisture barriers. If these steps are complete, the process can proceed smoothly, but they do add time if they’re part of the project. Insulation and Vapor Barrier: Most basements require moisture-resistant drywall or mold-resistant drywall. Adding insulation or a vapor barrier for better temperature control and moisture management adds extra time to the project. Complexity of Layout: A basement with multiple rooms, cut-outs for windows, doors, electrical outlets, or unique architectural details will require more precision and time. The Typical Timeline for Basement Drywall Finishing A basement drywall project generally follows these steps: 1. Preparation and Framing (1-2 Days) Framing: If framing isn’t already done, it typically takes 1-2 days for a standard basement. Proper framing creates a secure structure for hanging drywall sheets and ensures long-lasting results. Moisture Barrier: Basements in Newfoundland experience humidity, so adding a vapor barrier may be necessary. This step can take half a day. 2. Insulation Installation (1 Day) If insulation is needed to regulate the basement’s temperature and moisture levels, adding insulation will typically take a day. Fiberglass batt or rigid foam insulation is often used to help prevent mold growth and retain warmth. 3. Drywall Hanging (1-2 Days) Day 1: After framing and insulation are ready, the drywall sheets are measured, cut, and mounted. Most basement drywall projects for an 800-1,000 square foot area will take a day or two, depending on layout complexity and space. Ceiling Drywall: If the ceiling is included in the project, it will add a few extra hours or up to a day for installation, depending on the ceiling’s accessibility. 4. Taping and Mudding (3-5 Days) Day 1-2: Taping and mudding require several coats for a smooth finish. The first coat is applied over the seams and screw holes, followed by taping along the joints. Drying Time: Each coat needs time to dry before applying the next layer. In a basement with lower temperatures or higher humidity, drying can take up to a day per coat. Day 3-5: Additional coats of joint compound are applied, with each layer smoothed to ensure a flawless surface. 5. Sanding and Priming (1-2 Days) Sanding: After the final layer of compound is dry, it’s time to sand the walls. This step removes any imperfections and readies the walls for primer. Priming: Priming is critical in a basement, as it seals the drywall and prepares it for painting. A moisture-resistant primer is often recommended in basements to protect against potential dampness. 6. Final Touches and Cleanup (1 Day) After priming, any last-minute fixes or touch-ups are handled, ensuring a seamless finish. Professional drywall contractors will clean up the space, leaving your basement ready for the next phase—whether it’s painting or adding flooring. Overall Estimated Timeline For a standard basement in St. John’s with an 800-1,000 square foot area, the full drywall finishing process typically takes 7 to 10 days from start to finish. This timeline includes drying time for mudding and any necessary preparation like framing, insulation, and priming. Larger or more complex basements may take up to two weeks, while smaller, straightforward layouts could be finished in a week. Tips for a Smoother Basement Drywall Process Plan Ahead: If framing or insulation isn’t yet complete, allow extra time in your project schedule. Consider Moisture Control: Newfoundland’s coastal climate can bring high humidity levels, making mold-resistant drywall and moisture barriers worth the investment. Work with Professionals: Experienced drywall contractors know how to handle the specific needs of a basement, from managing humidity to creating a flawless finish. Why Choose St. John's Drywallers? At St. John’s Drywallers, we’re experts in drywall installation and finishing, including basements. With the right techniques, tools, and materials, we ensure a durable, polished result that will enhance your basement’s comfort and aesthetics. Our team understands the unique requirements of Newfoundland’s environment, and we’re dedicated to delivering high-quality results on time. Ready to transform your basement with smooth, professional drywall finishing? Contact St. John’s Drywallers to discuss your project and get an estimate. We’re here to make sure your basement finishing process is efficient, seamless, and built to last.
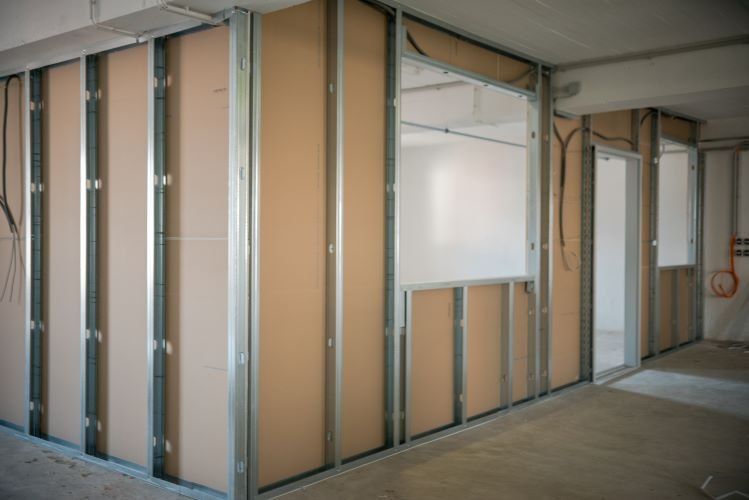
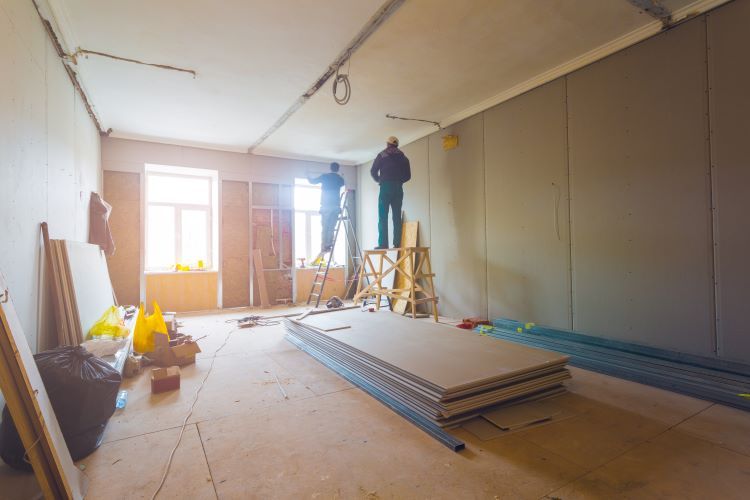
Choosing the right framing material is an essential step in any drywall project. When it comes to drywall framing , the two main options—metal and wood—each offer unique benefits and considerations. Knowing the pros and cons of each can help you make an informed decision tailored to your specific needs. At St. John's Drywallers , we have years of experience working with both metal and wood framing in St. John's, Newfoundland, and we're here to help you decide which is right for your next project. Why Framing Matters in Drywall Projects Framing serves as the skeleton of any drywall structure, giving it strength and shape. It supports the drywall sheets, keeps them straight, and enables the installation of electrical wiring, plumbing, and insulation. Choosing the right framing material not only affects the durability and aesthetics of the finished wall but also impacts ease of installation and maintenance over time. Metal Framing for Drywall: Pros and Cons Advantages of Metal Framing Durability and Longevity Metal framing is highly durable, resistant to warping, and does not rot or degrade over time, making it ideal for long-term stability. Moisture and Pest Resistance Metal does not absorb moisture, so it won’t swell, warp, or harbor mold growth. This makes it an excellent choice in damp or humid environments, common in basements or commercial buildings. Unlike wood, metal is not susceptible to termites or other pests, adding to its durability. Fire Resistance Steel studs are non-combustible, which adds a layer of safety in case of fire. This feature makes metal framing a preferred option in commercial settings or where fire safety is a priority. Lightweight and Easy to Handle Metal studs are lighter than wood and often easier to transport and install. They are also manufactured with pre-cut holes, making it simpler to run wiring and plumbing through the structure. Environmentally Friendly Metal framing is often made from recycled materials, making it a sustainable choice for eco-conscious projects. Drawbacks of Metal Framing Higher Initial Cost Metal studs are typically more expensive than wood studs, especially in residential applications. The higher material cost can make metal framing less budget-friendly for some projects. Thermal Conductivity Metal framing has high thermal conductivity, which can lead to energy loss and cold spots if not properly insulated. Specialized thermal breaks or additional insulation are often required. More Complex Fastening Process Unlike wood, metal framing requires specific screws or fasteners designed for steel, as well as compatible tools like metal-cutting saws. This can add complexity to the installation process. Wood Framing for Drywall: Pros and Cons Advantages of Wood Framing Cost-Effective and Accessible Wood framing is generally more affordable and readily available, making it the preferred choice for many residential projects. It can also be cut to fit onsite with standard tools, reducing installation time. Easy to Work With Wood is a familiar material to most builders and DIYers, and it’s easy to cut, drill, and fasten. This makes it an attractive choice for smaller-scale projects or renovations. Better Insulation Wood offers better thermal resistance than metal, helping to maintain a consistent indoor temperature and improve energy efficiency. This makes it suitable for exterior walls in homes or buildings where insulation is a priority. Strong Load-Bearing Capacity Wood is highly effective at bearing loads, making it a good choice for walls that may need to support shelving, cabinets, or other weighty additions. Drawbacks of Wood Framing Susceptibility to Moisture and Pests Wood can absorb moisture and is prone to mold, warping, and rotting in humid conditions. It is also vulnerable to termites and other pests, which can weaken the framing over time. Fire Hazard Wood is combustible, which can be a safety concern in some settings. Additional fire-resistant treatments can help, but these come at an added cost. Inconsistent Quality Natural wood can have knots, splits, or other imperfections that may affect its performance or aesthetics. It also expands and contracts with humidity, potentially leading to drywall cracks over time. When to Choose Metal vs. Wood Framing Commercial Projects: Metal framing is often preferred for commercial buildings due to its durability, fire resistance, and pest resistance. It’s also ideal for multi-floor structures where load-bearing requirements and long-term stability are crucial. Residential Basements: Metal framing is a smart choice for basements, as it resists moisture and mold—common issues in below-grade spaces. Interior Walls in Homes: Wood framing is often more cost-effective and easier to work with for interior walls in homes. It also offers better insulation, making it suitable for external walls and areas where energy efficiency is a priority. High-Humidity Areas: If you’re installing drywall in areas like bathrooms, basements, or other moisture-prone spaces, metal framing will offer better longevity. Making the Right Choice for Your Project Both metal and wood framing offer distinct advantages depending on the project’s requirements, budget, and location. Ultimately, choosing the right material comes down to understanding the unique needs of your space and consulting with experienced professionals. At St. John's Drywallers , we have the expertise to guide you through the framing selection process, whether you’re building a new office space, finishing your basement, or adding walls to an existing structure. Contact us today to learn more about our drywall framing services and find out which framing option will bring the most value to your project.
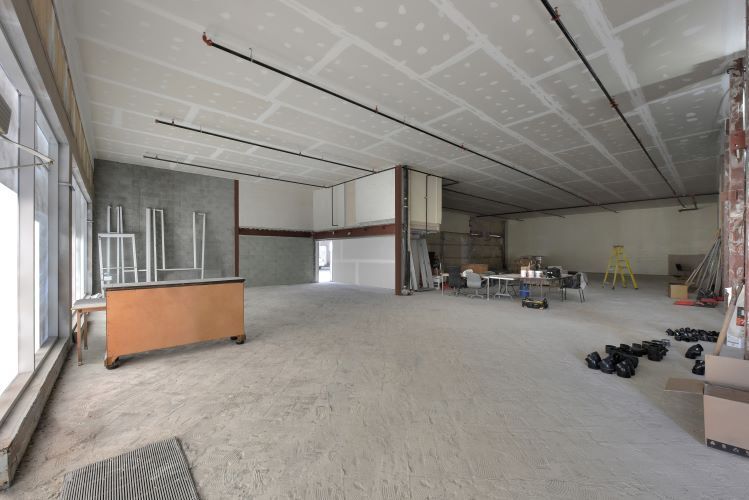
In commercial construction, the materials used can make or break the longevity and durability of a building. One such critical material is drywall, often overlooked in favor of more visible components like exterior finishes and flooring. However, drywall plays a key role in a building's structural integrity, fire resistance, soundproofing, and overall durability. At St. John’s Drywallers , we understand that choosing the right quality drywall can significantly impact the long-term value and performance of your commercial property. Here’s a look at how drywall quality affects the longevity of commercial buildings. 1. Structural Durability and Stability High-quality drywall contributes to the structural stability of a commercial building. While drywall doesn’t bear loads like steel or concrete, it still offers essential support to interior walls and ceilings. Poor-quality drywall can lead to issues such as cracks, sagging, or even wall failure over time. By opting for higher-grade drywall materials and expert installation, commercial property owners can ensure their interior walls maintain their strength and appearance for decades. This is especially critical in high-traffic areas, warehouses, or commercial buildings where durability is essential for safety and longevity. 2. Fire Resistance Fire safety is a crucial concern for any commercial building. Fire-rated drywall, also known as Type X drywall, is specially designed to resist the spread of fire for a specific period. The quality of the drywall you choose can directly impact the building’s fire resistance. For commercial spaces like office buildings, shopping malls, or manufacturing plants, installing fire-rated drywall is not just a safety precaution but a legal requirement in many areas. The use of premium fire-resistant drywall can slow the spread of fire, allowing occupants more time to evacuate and reducing damage to the building’s structure. Investing in high-quality fire-resistant drywall can ultimately save lives and protect your property from extensive fire damage. 3. Moisture and Mold Resistance In commercial settings, especially those located in humid climates like St. John's, Newfoundland, moisture and mold can be significant issues. Poor-quality drywall is more susceptible to water damage, which can lead to mold growth, structural weakening, and costly repairs. Moisture-resistant drywall, also known as green board, is designed to withstand damp conditions and prevent mold buildup. In areas prone to moisture exposure, such as commercial kitchens, bathrooms, or basements, using high-quality moisture-resistant drywall is essential to protect the building’s integrity and maintain a safe, healthy environment. 4. Soundproofing Capabilities Sound control is an important consideration for many commercial properties, such as office buildings, hospitals, hotels, and schools. Poorly installed or low-quality drywall can allow sound to easily travel between rooms, disrupting operations and reducing comfort for occupants. To maintain a quieter and more productive environment, soundproofing drywall, or acoustic drywall, is often used in commercial spaces. These specialized panels are designed to absorb and reduce sound transmission, helping to create a more comfortable and functional space. By choosing premium drywall with excellent soundproofing qualities, commercial property owners can reduce noise pollution and enhance privacy, which adds to the long-term value of the building. 5. Energy Efficiency and Insulation The quality of drywall can also impact a building's energy efficiency. High-quality drywall, when paired with proper insulation, can improve thermal regulation in commercial properties. This helps maintain consistent indoor temperatures, reduces the strain on heating and cooling systems, and lowers energy costs. Well-insulated drywall helps keep a building warm during the harsh Newfoundland winters and cool during the summer. Over time, this can translate to significant savings on energy bills and a reduced environmental footprint for the commercial property. 6. Ease of Maintenance and Repairs Commercial buildings require regular maintenance to stay in top condition. High-quality drywall is easier to repair and maintain, offering long-term durability even in high-traffic areas. Inferior drywall, on the other hand, may suffer from wear and tear much faster, leading to frequent repairs and maintenance. For example, premium drywall with added impact resistance can better withstand daily abuse from equipment, furniture, and people, making it ideal for commercial spaces like schools, hospitals, and retail environments. The durability of this type of drywall means fewer disruptions for tenants and lower maintenance costs for property owners. 7. Aesthetics and Long-Term Value The appearance of your commercial space is just as important as its functionality. High-quality drywall provides a smooth, flawless surface that is easier to paint and finish, ensuring a professional and polished appearance for your interior walls and ceilings. Inferior drywall can show imperfections like dents, cracks, or uneven surfaces, which can detract from the aesthetics of your building. This can negatively impact tenant satisfaction and reduce the property’s overall value. By choosing top-quality drywall, you enhance the look of your commercial space and maintain its long-term value for potential buyers or tenants. Conclusion The quality of drywall in your commercial building has a direct impact on its longevity, safety, and value. Investing in high-grade drywall solutions can help you avoid costly repairs, enhance fire and moisture resistance, improve soundproofing, and increase energy efficiency. At St. John’s Drywallers , we specialize in providing commercial drywall solutions that are built to last. Our expert team ensures that every project is completed to the highest standards, using the best materials available to ensure your commercial building stands the test of time. Contact us today to learn more about how we can help you improve the durability and longevity of your commercial property with high-quality drywall.
Maintaining the integrity and appearance of your drywall is essential for creating a beautiful and comfortable living space. At St. John's Drywallers , we understand that the walls of your home are more than just a backdrop; they play a crucial role in your home’s aesthetics, insulation, and overall value. Here are some practical tips to help you keep your drywall in perfect condition. 1. Regular Inspections The first step in drywall maintenance is to conduct regular inspections. Check your walls for signs of damage, such as cracks, holes, or water stains. Early detection can prevent minor issues from becoming major repairs. Pay special attention to areas around windows and doors, as these are common points for cracks to develop. 2. Cleaning Your Drywall Dust and grime can accumulate on your walls over time, dulling their appearance. Use a soft, dry cloth or a microfiber cloth to wipe down your walls regularly. For tougher stains, mix a solution of mild soap and water, dampen a cloth, and gently scrub the affected area. Avoid using harsh chemicals that can damage the drywall surface. 3. Addressing Humidity Levels Excess moisture can lead to mold growth and water damage in drywall. Use a dehumidifier in areas prone to humidity, such as basements or bathrooms, to maintain optimal moisture levels. It’s also essential to fix any leaks promptly and ensure your home is properly ventilated. 4. Touching Up Paint Over time, the paint on your drywall may chip or fade. Keep some leftover paint from your initial job for touch-ups. A small brush or roller can help you easily blend any repairs into the surrounding area, ensuring your walls look fresh and new. 5. Using Wall Protectors To prevent damage from furniture or heavy items, consider using wall protectors or bumpers. These can be installed behind furniture or in high-traffic areas to minimize scuffs and scratches. 6. Fixing Small Damages Promptly If you notice small holes or cracks, don’t wait too long to fix them. Use spackle or joint compound for small repairs, smoothing it out with a putty knife. Once dry, sand it down for a flush finish and repaint if necessary. For larger damage, consider consulting professionals for a more comprehensive repair. 7. Maintaining a Consistent Temperature Fluctuations in temperature can cause drywall to expand and contract, leading to cracks. Keep your home at a consistent temperature to reduce stress on your walls. Proper insulation can also help maintain stable temperatures, protecting your drywall from temperature-induced damage. 8. Professional Inspections and Repairs For any significant issues, such as large cracks or extensive water damage, it’s best to call in the professionals. At St. John's Drywallers, we can assess the situation and provide expert repairs to restore your walls to their original condition. Conclusion Keeping your drywall in perfect condition requires a combination of regular maintenance, prompt repairs, and professional assistance when needed. By following these tips, you can ensure that your walls remain beautiful and structurally sound for years to come. If you need assistance with drywall maintenance or repairs, don’t hesitate to contact St. John's Drywallers —we're here to help!
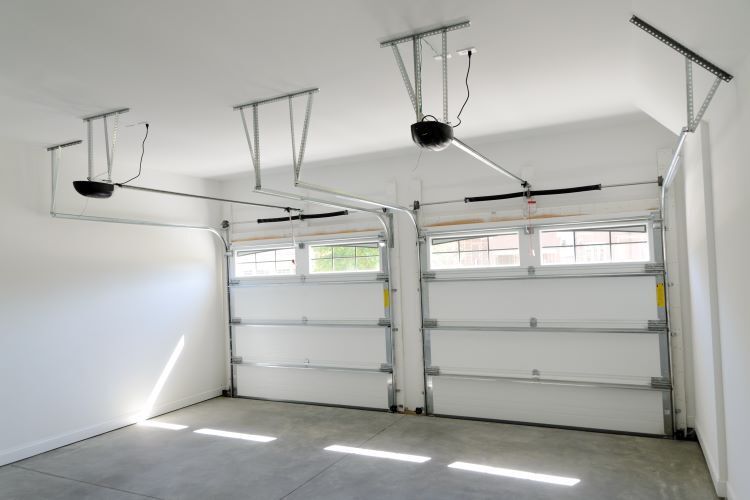
If you're looking to improve the functionality and appearance of your garage, finishing the drywall is an excellent way to transform the space. Not only does it make your garage look cleaner and more organized, but it also adds insulation and fire protection. At St. John's Drywallers, we know how to turn your garage into a well-finished, professional-looking area. In this blog, we’ll provide a step-by-step guide to help you understand the process of finishing drywall in your garage . Step 1: Preparation and Planning Before you begin, careful planning is essential to ensure a smooth process. Materials Needed: Drywall sheets (usually 1/2" or 5/8" thick for garages) Drywall screws or nails Joint tape (paper or mesh) Joint compound (drywall mud) Corner beads Drywall sander Primer and paint Insulation (if necessary) Tools: drill, utility knife, taping knife, sanding block, and safety gear Prepping the Garage: Clear the space: Remove any clutter or items from the garage that could be in the way. Check the walls: Ensure the wall studs are in good condition and properly spaced. Repair or replace any damaged studs before starting. Install insulation: If your garage needs insulation, this is the time to add it. Insulation can help regulate the temperature and make your garage more energy-efficient. Step 2: Installing the Drywall The next step is to hang the drywall sheets on the garage walls and ceiling. How to Hang Drywall: Measure and cut the drywall: Start by measuring your walls and ceiling to know where to cut the drywall sheets. Use a utility knife to score the drywall and snap it along the line. Hang the drywall on the walls first: Begin with the top row and work your way down. Attach the drywall to the studs using screws or nails, placing them about 16 inches apart along the studs. Ceiling installation: If you're also finishing the ceiling, hang the drywall on the ceiling after you’ve finished the walls. You may need assistance or a drywall lift to hold the panels in place while you secure them. Leave a gap near the floor: It’s recommended to leave a 1/2-inch gap between the drywall and the garage floor to prevent moisture wicking up into the drywall. Step 3: Taping and Mudding Once the drywall is installed, the next step is to hide the seams and fasteners with joint tape and compound. How to Tape and Mud Drywall: Apply joint tape: Start by applying mesh or paper joint tape to the seams where the drywall sheets meet. Place the tape over the seam and smooth it out to ensure there are no bubbles. First coat of joint compound: Apply the first coat of joint compound (mud) over the seams and fasteners with a wide taping knife. Feather the edges of the compound to create a smooth transition. Be sure to apply the compound to the corner beads for sharp, clean edges. Let it dry: Allow the first coat to dry for 24 hours before sanding or adding additional coats. Second and third coats: Once the first coat is dry, lightly sand it down to remove any bumps or ridges. Apply the second and third coats, gradually widening the area with each coat to further smooth the seams. Sand between coats as needed. Step 4: Sanding and Smoothing After applying the final coat of joint compound, it’s time to sand the drywall to achieve a smooth surface. How to Sand Drywall: Use a sanding block or pole sander: Sand the dried joint compound using a fine-grit sanding block or pole sander. Be gentle to avoid creating scratches or uneven surfaces. Check for imperfections: As you sand, keep an eye out for any ridges, bumps, or imperfections. Lightly sand these areas until the surface is smooth. Dust removal: Wipe down the walls with a damp cloth to remove dust before moving to the next step. You can also use a vacuum with a brush attachment to ensure a clean surface. Step 5: Priming and Painting Now that the drywall is smooth, it’s time to apply primer and paint to protect and finish the surface. How to Prime and Paint Garage Drywall: Apply primer: Use a high-quality primer designed for drywall to ensure an even finish and help the paint adhere properly. Primer is especially important in a garage, as it can help seal the drywall and resist moisture. Choose a durable paint: For garages, it’s best to use a durable, washable paint with a satin or semi-gloss finish. These finishes are easier to clean and will stand up to the wear and tear of garage use. Paint the walls and ceiling: Apply the paint using a roller for large areas and a brush for corners and edges. Let the paint dry between coats and apply at least two coats for even coverage. Step 6: Final Touches and Cleanup Once the paint is dry, you’re almost done! Take time to inspect your work and make any necessary touch-ups. Final Steps: Install baseboards or trim: If desired, you can add baseboards or trim to the bottom of the walls for a polished look. Check for imperfections: Inspect the walls and ceiling for any areas that need additional sanding, patching, or touch-up paint. Clean up: Remove any remaining dust, tools, and debris from the garage. Your newly finished drywall should be clean and ready for use! Why Finish Your Garage Drywall? Finishing the drywall in your garage has several benefits: Improved appearance: A finished garage looks cleaner and more professional, which can enhance the overall appearance of your home. Increased durability: Finishing the drywall protects it from damage, moisture, and wear over time. Enhanced insulation and fire protection: Properly finished drywall provides better insulation and can offer fire resistance, especially if using 5/8” fire-rated drywall. Conclusion Finishing drywall in your garage may seem like a daunting task, but with the right tools, materials, and guidance, it can be a rewarding DIY project. Whether you want a polished look for your garage or added protection, taking the time to properly hang, tape, mud, sand, and paint your drywall will give you long-lasting results. If you're not ready to tackle the project yourself, or if you'd prefer professional expertise, St. John's Drywallers is here to help. Contact us today for expert drywall finishing services to transform your garage into a functional and attractive space!

Popcorn ceilings, also known as textured or acoustic ceilings, were once a popular design trend in homes across North America. However, many homeowners are now choosing to remove this outdated feature in favor of smooth, modern ceilings. While removing popcorn ceilings can dramatically improve the appearance of your home, there are several important factors to consider before beginning this project. In this article, we’ll explore the key considerations when removing popcorn ceilings , including safety concerns, preparation steps, and the benefits of hiring a professional like St. John's Drywallers for the job. 1. Asbestos Testing: A Crucial First Step One of the most important considerations when removing popcorn ceilings is the potential presence of asbestos. Popcorn ceilings installed before the 1980s may contain asbestos, a harmful material that can pose serious health risks if disturbed. Inhaling asbestos fibers can lead to lung diseases, including mesothelioma and asbestosis. Before starting any removal process, it’s essential to have the ceiling tested for asbestos by a qualified professional. If asbestos is detected, you should hire an asbestos abatement specialist to safely remove the ceiling. Attempting to remove asbestos-laden popcorn ceilings on your own can be dangerous and is strongly discouraged. 2. The Mess Factor: Preparing Your Space Removing popcorn ceilings can be a messy and labor-intensive process. The texture is often removed by scraping, which can create a significant amount of dust and debris. Proper preparation of the space is critical to minimize the mess and protect your home’s interior. Here are some preparation tips: Cover Furniture and Floors: Before starting, remove as much furniture from the room as possible. For any items that remain, cover them with plastic sheeting or drop cloths to protect them from dust. Cover floors with plastic or heavy-duty tarps to make cleanup easier. Seal Off the Area: If you're working in a larger home, seal off doorways and vents to prevent dust from spreading to other areas of your home. You can use plastic sheeting and painter’s tape to block off openings. Wear Protective Gear: Even if asbestos isn’t present, removing popcorn ceilings will create a lot of dust. It’s essential to wear safety goggles, a dust mask or respirator, and protective clothing to minimize exposure to dust and debris. 3. Assessing Ceiling Condition Before starting the removal process, it's important to assess the condition of your ceiling. Popcorn ceilings that have been painted over or have water damage may be more difficult to remove than unpainted ceilings. Painted ceilings often require additional steps, such as applying a chemical stripper or sanding the surface before scraping. If the ceiling is damaged or has cracks, repairs may be needed after the texture is removed. In such cases, it’s wise to hire a professional drywall contractor to ensure that the ceiling is restored to a smooth, flawless finish. 4. Choosing a Removal Method There are several methods for removing popcorn ceilings, and the right one depends on the condition of the ceiling and your comfort level with DIY projects. The most common methods include: Wet Scraping: This is the most popular method for removing popcorn ceilings. It involves spraying the ceiling with water to soften the texture and then using a wide scraper to remove it. This method works best on unpainted ceilings. Dry Scraping: If the ceiling has been painted, dry scraping may be necessary. However, this method is more labor-intensive and creates more dust. You may need to sand the ceiling afterward to achieve a smooth surface. Chemical Removal: For heavily painted ceilings, chemical strippers can be applied to dissolve the texture. This method requires proper ventilation and protective gear due to the fumes produced by the chemicals. Sanding: In some cases, sanding the ceiling may be necessary to remove stubborn texture. This process requires specialized equipment and is best left to professionals due to the amount of dust it produces. 5. Repair and Refinishing Once the popcorn texture is removed, you’ll likely need to repair any imperfections or cracks in the ceiling. This may involve patching holes, filling in dents, and smoothing the surface with joint compound. After repairs are made, the ceiling will need to be refinished. Many homeowners opt for a smooth, modern ceiling, but other finishing options are available, such as knockdown texture or a light orange peel texture. The finishing process requires precision and skill to ensure an even, polished look. 6. Time and Effort Removing popcorn ceilings is a time-consuming process that can take several days, depending on the size of the room and the condition of the ceiling. Between preparation, scraping, repairs, and refinishing, it’s important to set realistic expectations for how long the project will take. For homeowners with busy schedules or those who are not comfortable with DIY projects, hiring a professional drywall contractor can save time and ensure high-quality results. 7. The Benefits of Professional Popcorn Ceiling Removal While DIY popcorn ceiling removal is possible, hiring a professional drywall contractor like St. John's Drywallers offers several key benefits: Safety: Professionals are trained to handle asbestos testing and removal if necessary. They also have the right protective gear and equipment to minimize exposure to harmful materials. Efficiency: Professionals can complete the job more quickly and with less mess than a DIY approach. They have the expertise to assess ceiling conditions, choose the best removal method, and handle any necessary repairs. High-Quality Finish: Achieving a smooth, even ceiling can be challenging for DIYers. Professionals have the experience to ensure that your ceiling looks flawless after the texture is removed. Cleanup: Removing popcorn ceilings creates a lot of debris, and cleanup can be a hassle. Professional contractors handle all the cleanup, leaving your home looking neat and refreshed. Conclusion Removing popcorn ceilings can transform the look of your home and create a modern, updated interior. However, it’s essential to consider key factors like asbestos testing, the condition of your ceiling, and the best removal method before starting the project. For homeowners looking to save time, avoid mess, and achieve a high-quality finish, hiring a professional like St. John's Drywallers is the best option. At St. John's Drywallers , we specialize in safe, efficient popcorn ceiling removal and drywall finishing. Our experienced team can help you refresh your ceilings and enhance the beauty of your home. Contact us today to schedule a consultation and take the first step toward a smoother, more modern ceiling.