How Drywall Framing is Done
At St. John's Drywallers, we pride ourselves on delivering top-notch drywall services to the residents of St. John's, Newfoundland. One of the fundamental steps in drywall installation is framing. Proper framing ensures the drywall is securely attached and maintains the structural integrity of the wall. In this blog article, we will walk you through the drywall framing process, highlighting key steps and considerations to ensure a successful project.
What is Drywall Framing?
Drywall framing involves creating a structure of studs and tracks that provide a solid foundation for attaching drywall sheets. This framework is typically made from either wood or metal and is essential for the stability and durability of the finished wall.
Steps in the Drywall Framing Process
1. Planning and Preparation
Measuring and Marking
The first step in drywall framing is careful planning. Measure the dimensions of the area where the drywall will be installed. Mark the positions of the studs on the floor and ceiling using a chalk line or pencil. This ensures precise alignment during the installation.
Gathering Materials
Ensure you have all the necessary materials and tools, including:
- Studs (wood or metal)
- Tracks (for metal framing)
- Screws or nails
- Level
- Tape measure
- Saw (for cutting wood or metal)
- Drill
2. Installing the Bottom and Top Plates
Bottom Plate
Start by attaching the bottom plate to the floor. If you're working with a concrete floor, use a powder-actuated tool to secure the plate. For wooden floors, nails or screws will suffice. Ensure the bottom plate is level and securely fastened.
Top Plate
Next, install the top plate directly above the bottom plate on the ceiling. Use a level to ensure it is perfectly aligned with the bottom plate. Secure the top plate with screws or nails.
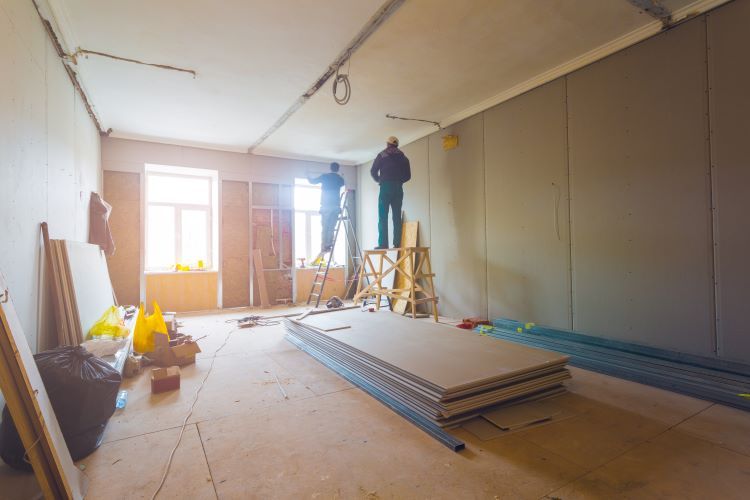
3. Installing the Studs
Cutting Studs
Measure the distance between the bottom and top plates and cut the studs to fit. Remember to account for any variations in the floor or ceiling height.
Placing and Securing Studs
Position the studs vertically between the bottom and top plates. Start from one end and work your way across, placing studs at 16-inch or 24-inch intervals. Secure each stud with screws or nails through the bottom and top plates. Use a level to ensure each stud is plumb.
4. Adding Additional Framing Elements
Door and Window Frames
If your wall includes doors or windows, additional framing is required. Create a frame using headers and king studs to provide extra support around these openings. Ensure these frames are securely attached to the surrounding studs.
Blocking
Add horizontal blocking between studs at regular intervals. This provides additional support for heavy fixtures or cabinets that may be attached to the wall later.
5. Checking Alignment and Stability
Final Adjustments
Before proceeding to drywall installation, double-check the alignment and stability of your framing. Ensure all studs are plumb, the plates are level, and the entire structure is secure.
Reinforcements
For added stability, consider reinforcing the corners and any weak points with additional studs or brackets. This will help prevent any movement or shifting over time.
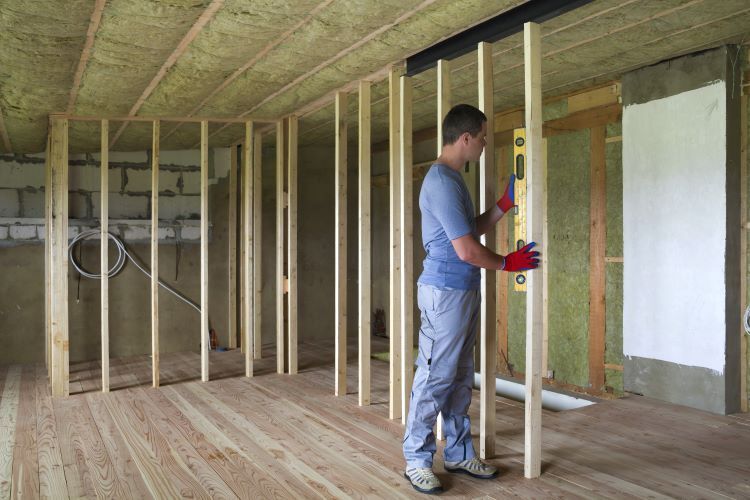
Types of Framing Materials
Wood Framing
Wood is the traditional choice for drywall framing. It is cost-effective, easy to work with, and widely available. However, wood can warp or rot over time, especially in areas with high humidity.
Metal Framing
Metal studs and tracks are becoming increasingly popular for drywall framing. They are resistant to moisture, pests, and warping, making them ideal for basements and other damp environments. Metal framing requires different tools and techniques, but offers superior durability and stability.
Conclusion
Drywall framing is a critical step in ensuring a strong, stable, and long-lasting wall. By following the steps outlined above, you can achieve a professional-quality framing job that will support your drywall installation perfectly.
At St. John's Drywallers, we have the expertise and experience to handle all your drywall framing needs. Whether you're undertaking a new construction project or renovating an existing space, trust us to deliver exceptional results. Contact us today to learn more about our services and how we can help with your next drywall project.
You might also like